It's that time of year when many of the foods native to the Americas come out to shine in all their glory on our holiday tables. The history behind these foods goes back thousands of years and are apart of a long history of crop domestication in the Americas.
Take for instance one of the world's most popular crops, corn. Corn was domesticated thousands of years ago through selective breeding of the best-sized kernels from a plant called teosinte. Over time like many of our crops, they have been bred to what we know of them today.
Other crops that are native to the Americas that we use during our holiday meals are Turkeys, corn, potatoes, sweet potatoes, and pumpkins to name a few.
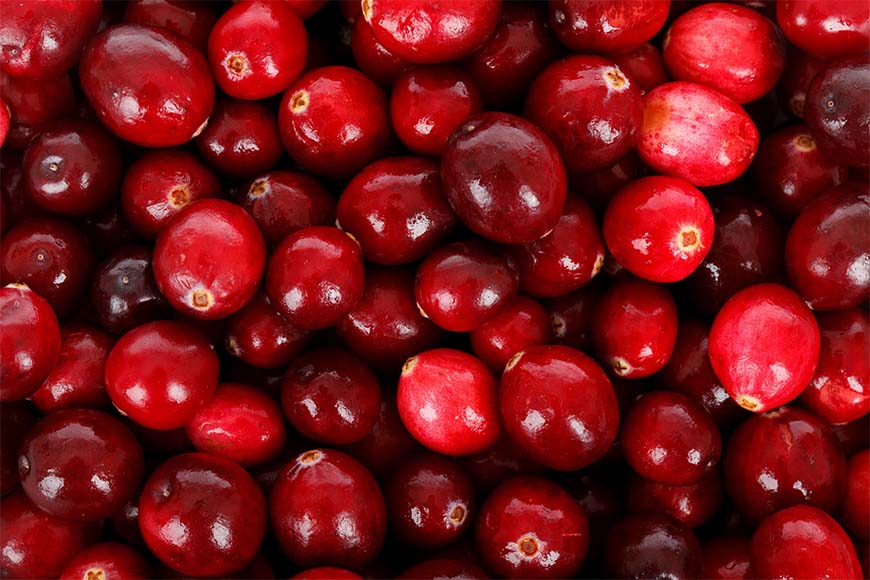
Vaccinium macrocarpon
I want to focus on Cranberries, or at least Vaccinium macrocarpon. This is the main species grown for production in North America, and mostly about 80% of the US-grown crop is in two states, Wisconsin and Massachusetts.
To establish an acre of cranberry for commercial production can cost up to 50,000 dollars. I’m going to guess most of us are not growing cranberries for commercial production, but what can you expect in your backyard?
Well a rough estimate, in the garden, is that in a 5-foot by a 5-foot garden bed of cranberry bushes you should harvest about 5 pounds of berries a year. This can vary depending on which variety of cranberry you are growing and the soil conditions.
Cranberry anatomy
Cranberries are overall a low creeping shrub or vine with slender stems and small evergreen leaves. The flowers can range in color but are closest to dark pink. The flower is perfect and the style and stamen of the flower are fully exposed and pollinated by bees.
The fruit is a berry that develops much larger than the leaves of the plant. Initially, the fruit is green and ripens to a red or dark red color depending on variety, some developing very dark and almost black colors.
The roots of cranberry plants are very shallow, and this is why when prepping the garden beds we only prep to 8 inches. The roots will grow in the upper 4inches to 6 inches of soil. This is why caution needs to be taken during periods of drought.
Varieties of cranberries
Let’s first talk about cranberry varieties, and oh man is this kind of a doozy. Finding heirloom cranberry varieties can be hard, and less likely to be supplied by your local nursery.
First, there are a lot of varieties out there that are patent and owned. These verities need to be grown by a licensed commercial grower, not intended for backyard use. So let's not talk about those at the moment, and make sure you are not growing them in your yard.
As for varieties on the market for back yard consumers, two popular ones are Ben Lear’s cranberry, Stevens cranberry, and pilgrim cranberry. The Ben Lear is one of the most popular, they produce large fruits that ripen early in the season, a favorite of many chefs.
These varieties are growing to usually range in Hight from 1 to 2 feet and have a spread of about the same, often a little wider than tall. Varieties such as Stevens are hardy in zones 3-9 and grow up to 2 feet tall. The Ben Lear cranberry will grow up to 10’’ tall and hardy in zones 4-8.
Prepping the soil
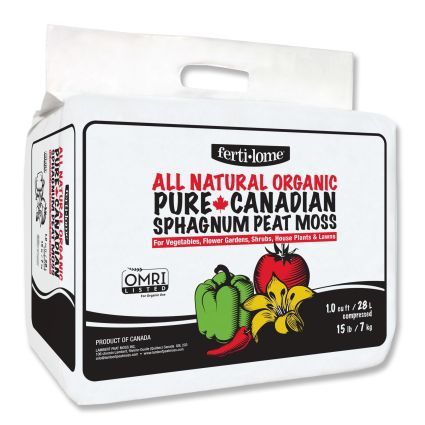
Cranberry bushes are one of the plants that ask for some of the most from us when prepping the soil for them to enter into our garden beds. One they need high acidity, pH between 4 and 5, and second lots of water, and third their special garden bed to grow in.
Make sure you can grow them first, cranberry plants need to receive at least 3 months of temperatures between 32 and 45 degrees. If you are somewhere that doesn’t get 3 months, but you have a cool room or other option to move container planted cranberries, that should work for you too.
To prepare the soil start by removing about 8 inches of the soil and lining the bottom with plastic, if you are in a heavy clay you shouldn’t need to do this step as water will naturally move through the soil slower.
Backfill the garden bed in with 8 inches of peat mixed with bone-meal, bloodmeal, and rock phosphate, you can use these in the raw or look at using a premixed fertilizer. Simply follow application rates from the bag, or look at using about 1# of rock phosphate and blood meal per 50 square feet and ½ pound of bone meal per 50 square feet.
Be sure to slowly irrigate the garden beds before transplanting your cranberry starts. Peat moss can absorb a lot of water but it can be slow, so mist the pile slowly or wait until substantial rains saturate the soil. after that point, you can transplant your cranberries into the garden bed.
Growing from clones
The best and most productive cranberries to grow in your backyard garden are going to be from established cultivars such as the few mentioned above. You can start from seeds, but these new plants will be hybrids of the parents and possibly not produce as a cloned offspring would.
First-year clones, space plants about 1 foot from each other. Buying these first-year clones is your cheapest option for buying starts, but also will take the longest to receive your first harvest. For older clones place them 2 to 3 feet apart.
Over the next year or two these clones will fill up most of the garden beds in much of the same way as strawberries do, runners will grow out to 3 feet from the parent plant and establish themselves. Be sure to hand weed thoroughly, cranberries do not compete well with weeds.
The runners that establish in the first and second year are good, and we want to encourage this growth in the first two years. This is what is going to fill our beds up and prepare us for a harvest the following year.
In the third year and beyond we want to focus on the upright growth of cranberries, these are what produce the flowers and ultimately the fruits. It's going to feel like a long time from the first year of planting to getting your first harvest, but it's going to be worth the wait.
Plant care
The most important step in cranberry care in the first year is constant watering. You do not want the cranberries to dry out at any time, but especially in the first year.
During the first year using a slow-release acidic loving fertilizer once a month, an organic option with a higher nitrogen ratio is preferred. After that, you can use a balanced liquid fertilizer or stay with the granular.
Make sure to keep the soil moist during the first year. Irrigate often, the peat you are growing in should be moist to the touch but not soggy. Cranberries don’t grow in water, as many may think seeing how they are harvested, but they do need a good amount of moisture.
Prune your cranberries in the third year of their growth. At this time you can take cuttings, or transplant whole runners to expand your garden.
Growing from seed
You can try to start your cranberries from seed, however, the seeds do not come true to what the parents were and this can leave you with cranberries that have low yields or do not produce at all. Starting from seed is also very time consuming and finicky.
The easiest way to start from seeds involves four steps.
- First, fill a 4-inch pot with well moisten peat mix and press down firmly. Place a ¼ inch hole in the center and add a few seeds into the hole.
- Cover and keep moist for 4 weeks at 65-70 degrees Fahrenheit,
- after that 4 weeks transfer into a garage or warm freezer around 25 – 40 degrees Fahrenheit for 6 weeks,
- finally, transfer back to a cool room at 40-55degrees Fahrenheit until they sprout(can take months).
The Bloom and Harvest
The cranberry bush will bloom in spring, about a month later fruit begins to form. Cranberry fruits are unique in they develop 4 hollow compartments, these air pockets cause the fruits to float. You don’t have to flood a field to harvest Cranberries, however, this makes it very efficient on large operations harvesting acres upon acres.
For home harvest you do not need to flood your garden, just keep the plants well-watered during the growing season and harvest berries once they are bright red and fully formed. Once you harvest them store them in the freezer or use them fresh to make cranberry sauce, fold them into some homemade cranberry-walnut bread, or dry them for use in salads and as snacks in the winter.
But since the holidays are upon us it’s a perfect time to get into everyone’s favorite, and by far, so much better than buying it from the store in a can. Yes, I’m talking about Cranberry sauce. You can vary your recipe depending on what you have available or what depth of flavors you are looking for.
Below is a quick recipe I thew together using ginger beer. Try it out or adjust to your needs.
CRANBERRY SAUCE
The best cranberry sauce is of course homemade. So, skip the canned stuff you will never go back if you try making it homemade.
I had some cranberries around, just under 1 pound and that’s perfect for my recipe. So, I scavenged around the kitchen for some other ingredients: sugar, some spices, a few limes from my tree, and a cup of ginger beer.
Had I had fresh ginger on hand, that would have been a great addition, but I wanted to throw together a practice recipe before the holiday weekend. So, this is what I came up with.
You can substitute the ginger beer and lime juice for orange or lemon, or even without citrus. It also doesn’t need anything fancy; a cranberry sauce is a berry compote. Cook them down with a bit of sugar and they should be good with anything you mix with them and far better than any canned product. Get creative and let it complement your other dishes.
Homemade Lime-Ginger cranberry sauce
1 pound fresh cranberry
1 Cup Ginger beer
½ cup fresh squeezed lime juice
1 cup of sugar
½ teaspoon cinnamon
¼ teaspoon nutmeg
Zest of two limes
Step one:
In a saucepan add ginger beer, lime juice, sugar, and spices. Bring this mixture to a simmer and cook for 2 minutes to incorporate all the ingredients.
Step two:
Add cranberries and zested lime and cook for 10 minutes under a low simmer. The sauce will begin to thicken as it cooks down. You will also notice the cranberries pop, use caution.
Step Three:
Once your cranberry sauce has cooked remove it from heat and gently mash cranberries to develop a smoother texture.
Step four:
Finally, move the cranberry sauce to cool uncovered in the fridge for an hour or two. After that cover the container and label with the continents and date.
Enjoy!